


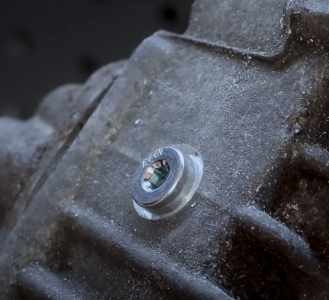
 Professional workshop repair guide
BMW ATC35L Transfer Case Drain Plug Retrofit Guide
How to create a serviceable M8 x 1 oil drain point without removing the transfer case, while controlling drilling depth, sealing-face geometry and swarf.
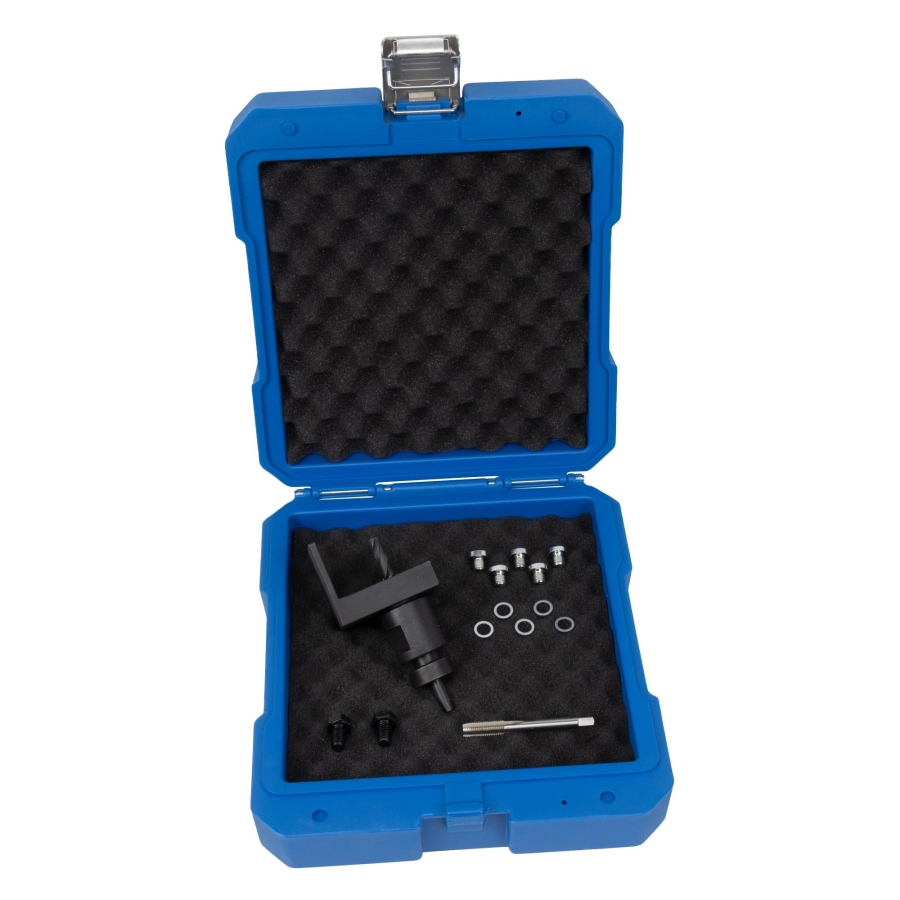
The ATC35L does not have a factory oil drain plug. A conventional drain-and-refill service can therefore require removal or extensive handling of the transfer case. This retrofit system uses a housing-specific template, guided drill and milling tool, M8 x 1 tap and sealing plug to create a repeatable service point while the transfer case remains installed.
The repair is intended for professional workshops. Correct case identification, controlled swarf handling, the specified fluid and the applicable BMW repair information remain essential.
Why ATC35L Oil Condition Still Matters
A transfer case may be described as lifetime-filled, but its lubricant still operates under heat, load and contamination.
The ATC35L distributes torque in BMW xDrive systems and contains friction components whose operation depends on the correct lubricant condition. In service, the oil can be affected by age, repeated thermal cycles, clutch-material wear particles and moisture-related oxidation. As contamination and viscosity change, the oil has less ability to support consistent lubrication and clutch operation.
What the retrofit changes
The modification does not alter the transfer case operating principle. It creates a correctly positioned, sealed drain point so the oil can be renewed more efficiently during future servicing.
Professional repair requirement
This procedure permanently modifies the transfer case housing. Do not proceed unless the unit is positively identified as an ATC35L, the template seats without interference and the workshop can control drilling depth, swarf, cleaning and refilling. If reliable access or contamination control is not possible, removal and bench repair is the safer method.
How the Housing-Specific Tool Controls the Repair
The result depends on more than drilling a hole: position, depth, sealing face and thread alignment must all be controlled.
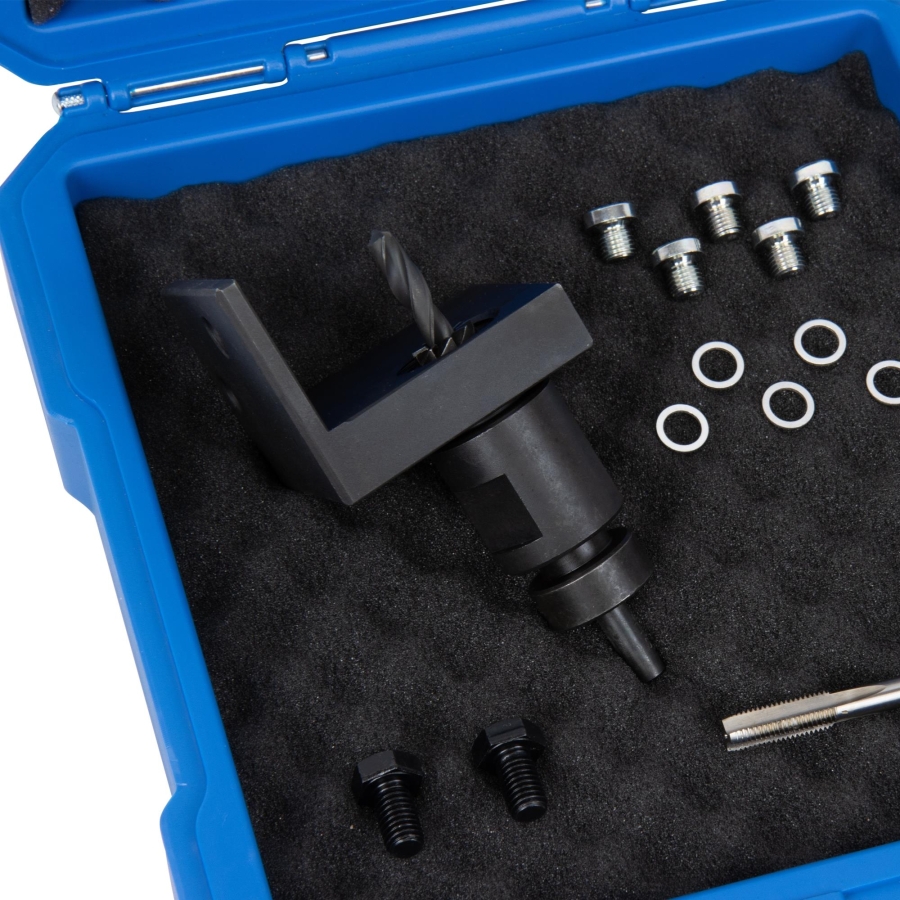
One guided system for four critical operations
The mounting bracket locates from defined points on the ATC35L housing. The guide sleeve then supports the combined carbide drill and milling tool at the required angle and limits its working depth.
- Locates the drain point on the correct part of the housing
- Controls drill alignment and maximum depth
- Creates the housing opening
- Mills a flat annular sealing surface for the plug seal
- Creates an internal lead-in for the M8 x 1 tap
Before beginning the repair
Swarf-control rule
Coat the drill, milling section and tap with a suitable grease such as CS grease. The grease holds the small amount of swarf in the tool flutes. Withdraw and clean the tool regularly, clean the interface between the guide sleeve and angle adapter, and direct compressed air away from the housing opening. Never blow loose swarf into the transfer case.
Step-by-Step ATC35L Drain Plug Installation
Follow the current kit instructions and vehicle repair data. The sequence below explains the function of each operation.
Important image note
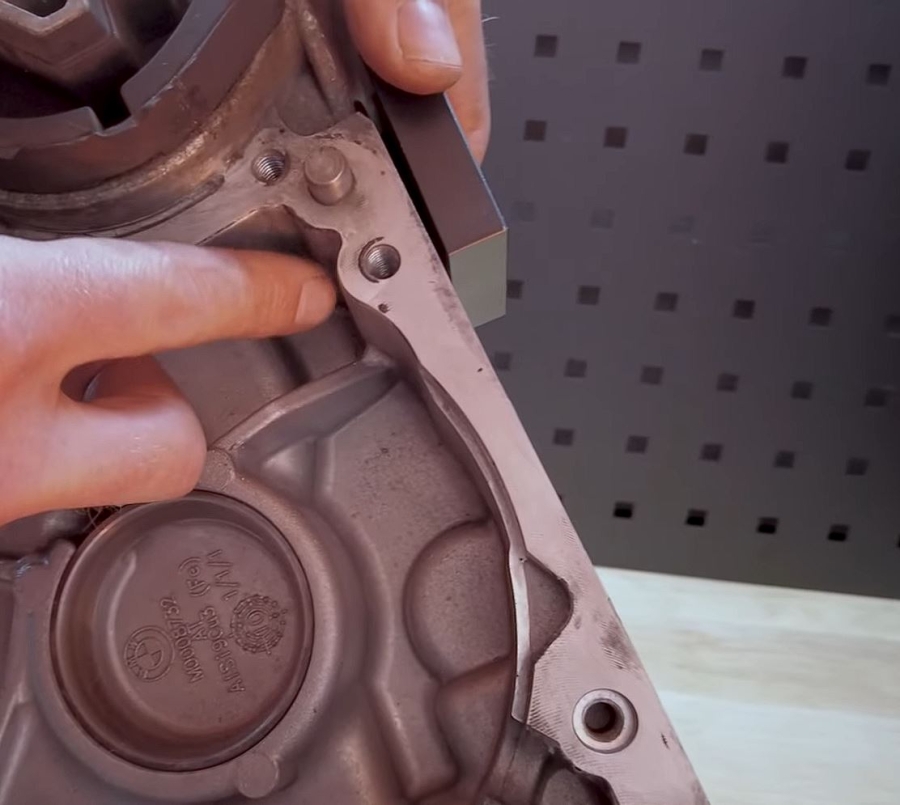
Some photographs show an open or removed housing so the drilling location and finished geometry can be seen clearly. The tool is designed to perform the retrofit on the installed transfer case when access, identification and contamination control are suitable.
Identify and prepare the mounting position
Clean the housing and the template contact points. Verify the transfer case identification and inspect the intended area for previous damage, cracks or interference. The template must sit fully against its locating surfaces without rocking or being forced.
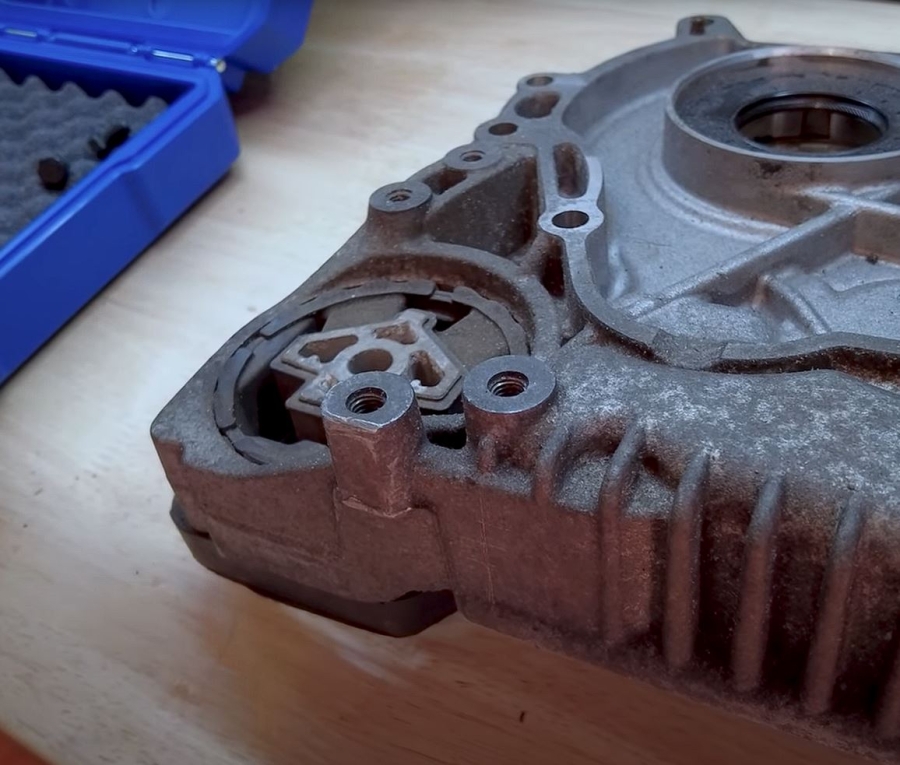
Secure the angle drilling template
Bolt the template bracket to the specified ATC35L housing points. Tighten it evenly so the guide axis cannot shift. Screw the drill guide sleeve into the bracket until it reaches its designed stop, then recheck that the complete assembly is rigid and correctly seated.
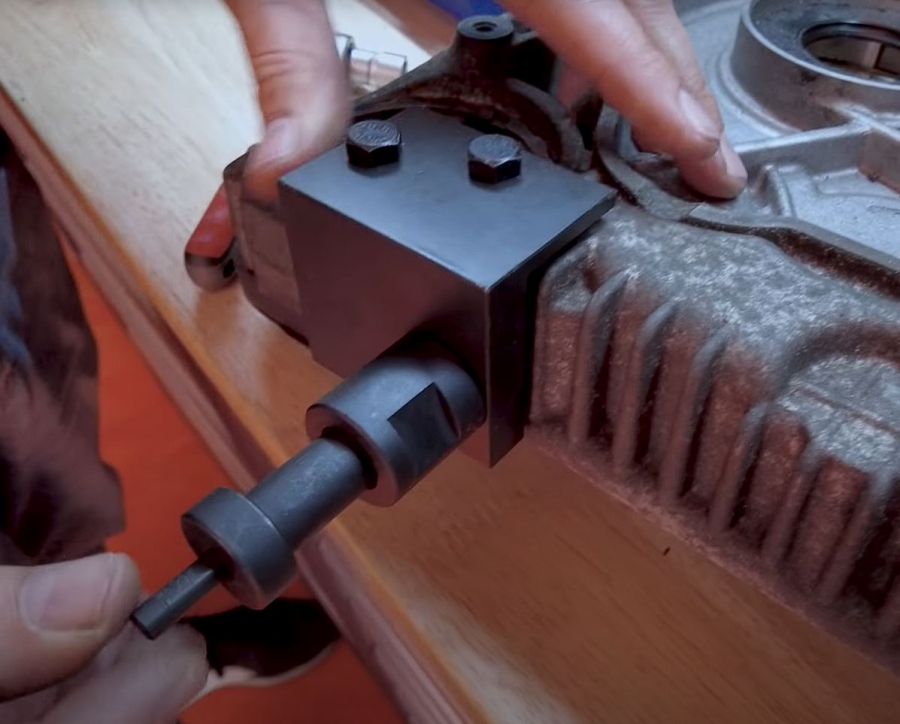
Grease, drill and mill the housing
Apply suitable grease to the drill and milling edges. Insert the combined tool through the guide sleeve and machine at a controlled speed without side load. Advance only until the integrated depth stop reaches its designed position. Do not continue forcing the tool after the stop is reached.
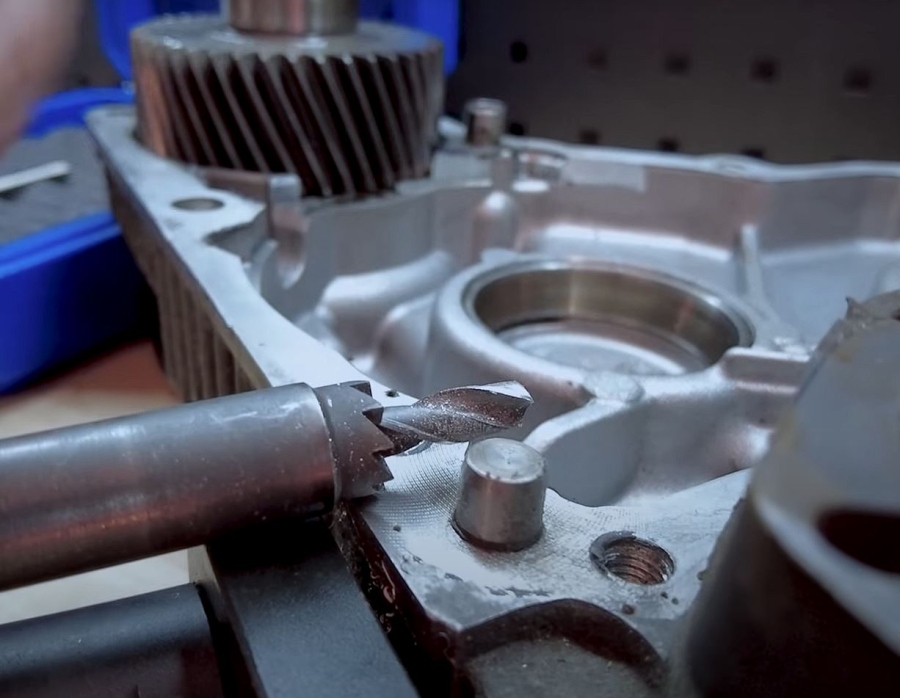
Withdraw the tool and drain the old oil
Withdraw the cutter carefully so grease and captured swarf remain in its flutes. Clean the tool and guide components, then allow the old transfer case oil to drain completely through the new opening into a clean container. Inspect the drained oil and the machined area for abnormal debris.
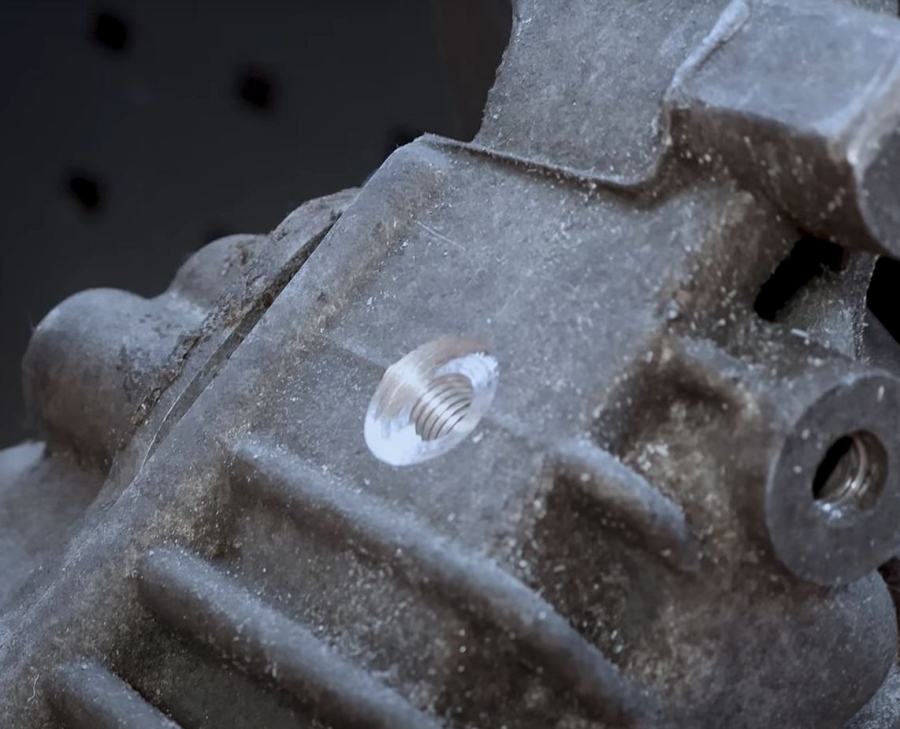
Cut the M8 x 1 thread
Apply grease to the supplied M8 x 1 finishing tap. Keep it aligned with the prepared opening and cut progressively, reversing as required to break the chip. Remove, clean and regrease the tap as necessary. Do not force a loaded tap or allow swarf to be pushed into the housing.
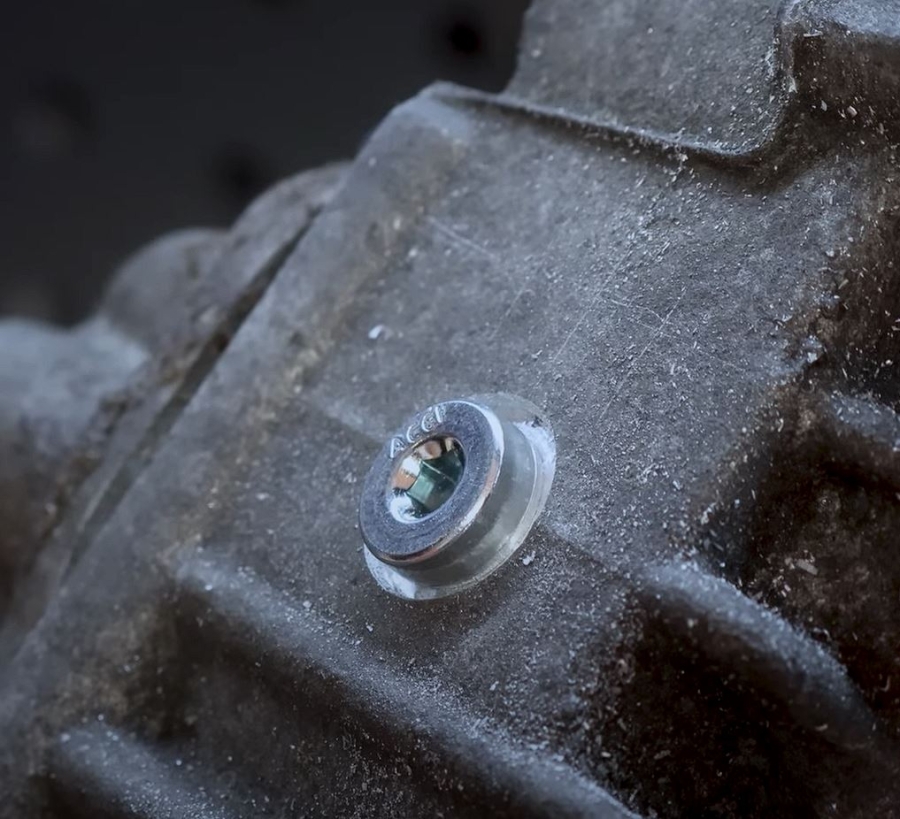
Clean, install and tighten the drain plug
Remove all accessible grease and swarf, clean the machined sealing land and inspect the new thread. Fit a supplied M8 x 1 plug with an undamaged sealing ring. Tighten the supplied plug to 10–15 Nm, unless the current kit instructions specify a revised value. Do not overtighten the aluminium housing.
Refilling the transfer case
Refill through the original upper fill opening using a suitable hook-style adapter and hand pump. Keep the vehicle level and use the exact transfer case oil, filling quantity or level procedure specified for the vehicle. Refit the original fill plug according to current repair data, clean the housing and inspect both plugs for leakage.
Final workshop checks
Before lowering the vehicle
- Confirm the drain plug sits squarely on the milled sealing face
- Confirm the sealing ring is present and not displaced
- Verify the correct refill level and fill-plug installation
- Remove all tools, covers and contamination protection
After the repair
- Run the vehicle only according to the applicable service procedure
- Inspect the new drain point and original fill plug for leakage
- Document the fluid type, repair date and installed plug torque
- Inform the customer that future oil service is now possible through the retrofit drain
ATC35L Compatibility and Vehicle Applications
Vehicle model lists are a guide only. Confirm the installed transfer case before machining.
| Transfer case | BMW reference numbers | Verification rule |
|---|---|---|
| ATC35L | 27105A371F3 27105A4A093 27108612557 27108643150 |
Confirm the designation and housing before fitting the template. A listed chassis can use different drivetrain components depending on version and production date. |
Compatible BMW model families
Compatibility depends on the installed transfer case, not only the model designation. Always verify by transfer case identification and current BMW parts or repair information.
ATC35L Drain Plug Retrofit Kit
A workshop system for accurate housing preparation and repeatable future servicing.
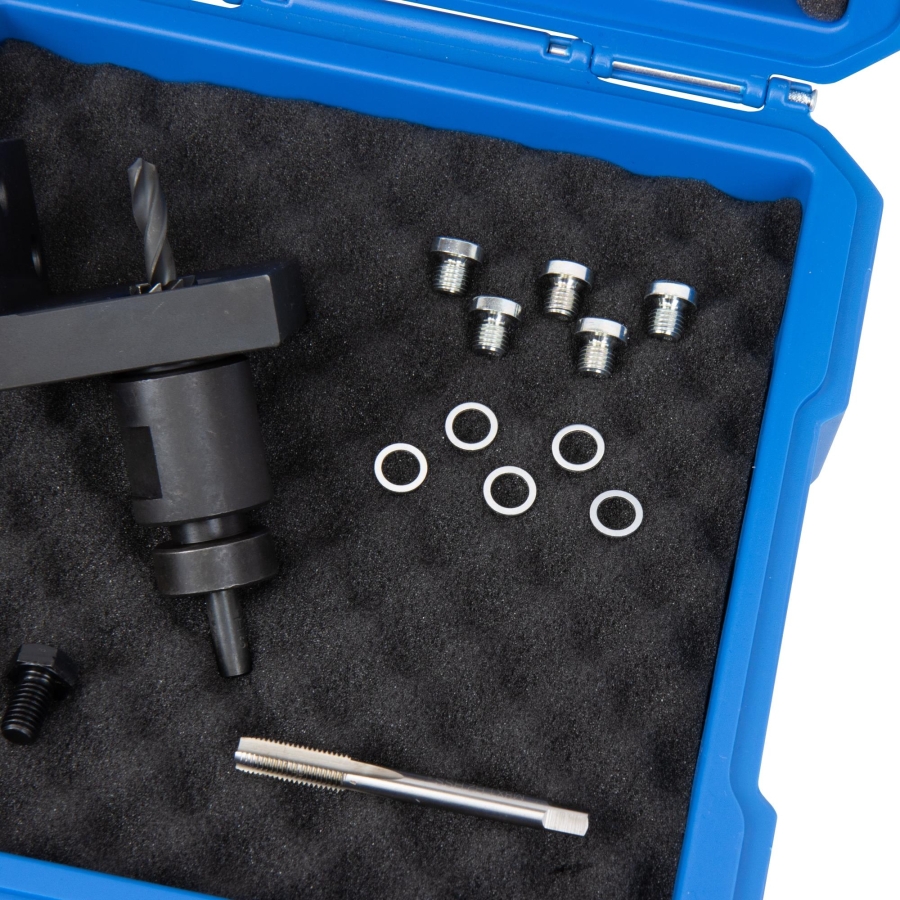
Scope of delivery
- Angle drilling template bracket
- Drill guide sleeve
- Carbide drill and milling tool with depth stop
- M8 x 1 finishing thread tap
- Five M8 x 1 drain plugs with sealing rings
- Robust storage case
Workshop information
- Lucaro product code: 123205
- Replacement plugs, 5-piece set: item.no. 123204
- Tool reference: to be used as BMW 27105B8C3E4
- Precision-manufactured Stahlmaxx workshop tool
- Individual components available separately when required
Original numbers are provided for comparison purposes only. This is not an original BMW tool.
Frequently Asked Questions
Practical answers for planning the ATC35L retrofit in a workshop.
Can the drain plug be installed without removing the transfer case?
Yes. The housing-specific angle template is designed to guide the repair while the ATC35L remains installed, provided the workshop has suitable access and can safely control alignment, depth, swarf and cleaning.
Does the kit fit every BMW xDrive vehicle in the model list?
No assumption should be made from the chassis code alone. The listed models can have different transfer cases depending on drivetrain, engine, production date and market. Confirm that the installed unit is an ATC35L before machining.
Why must grease be applied to the drill, milling tool and tap?
Grease holds the small amount of generated swarf in the cutting flutes, making controlled removal and cleaning easier. Demonstration work may show dry tools to make swarf production visible, but workshop use should always include suitable grease.
What torque is used for the new drain plug?
The supplied M8 x 1 sealing plug is tightened to 10–15 Nm according to the current product information. Always follow any revised instructions supplied with the kit and avoid overtightening the aluminium housing.
How is the ATC35L refilled after the retrofit?
Refilling is performed through the original upper fill opening, typically using a hook-style filling adapter and hand pump. Use the exact fluid and level procedure specified for the vehicle and keep the vehicle level.
Can replacement drain plugs be ordered separately?
Yes. M8 x 1 drain plugs with sealing rings are available as a five-piece replacement set under item.no. 123204.




Post comment